I have made some drastic changes to my blog. As you can see, I now have a custom domain, a new theme, also now the blog is hosted at amazon S3. But the most important part is that I am now using Statiked for writing and publishing my blog.
I had a wordpress blog, and I was making use of a blog client called MarsEdit. Publishing a post was very simple. I configure my blog settings in MarsEdit, compose my post, send to blog. That’s it! The workflow was that simple. But then I came across jekyll. So I decided to create a static blog using jekyll and make use of github to host my blog. To create a post using jekyll, I had to run few commands from terminal(No big deal), but still using a blog client was much simpler. All I had to do was a button click.
Statiked was born out of this need. It takes care of everything, from html generation to publishing the post. All I needed to do is set up my blog details in the preference pane of Statiked, choose text editor of my choice, provide google analytics code, choose a comment system (or none), add hosting details. Bam!
Setting up a blog in Statiked is quite easy,
-
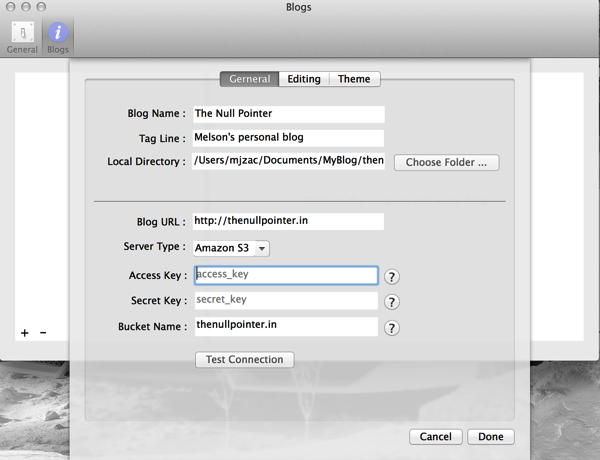
Add the general details of blog and hosting details.
-
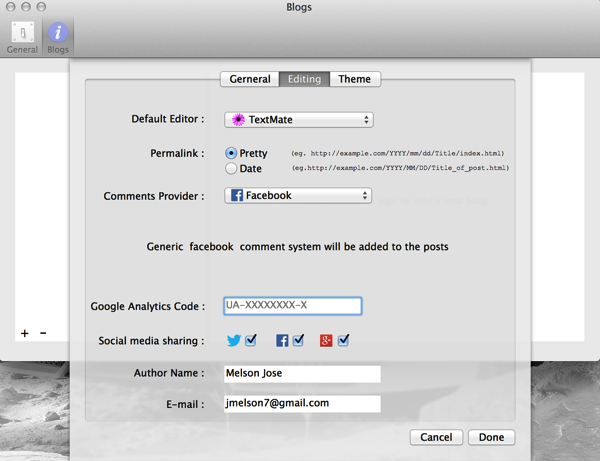
Choose your editor, comment system etc.
-
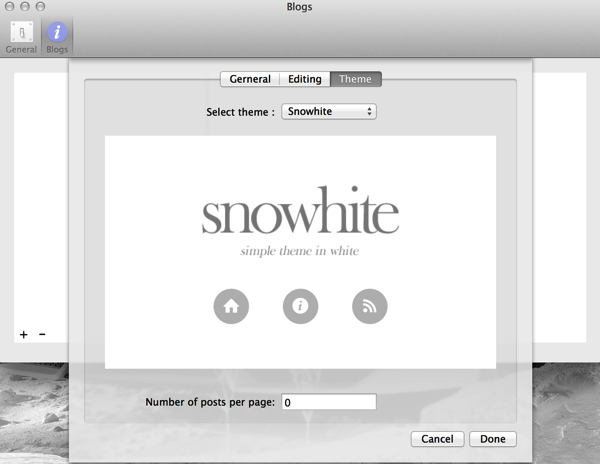
Select a theme.
-
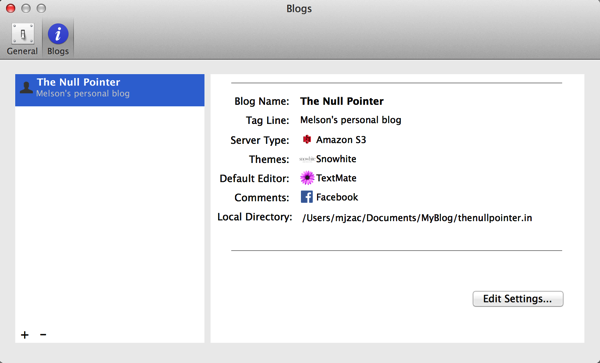
Once you are done, the settings can be previewed.
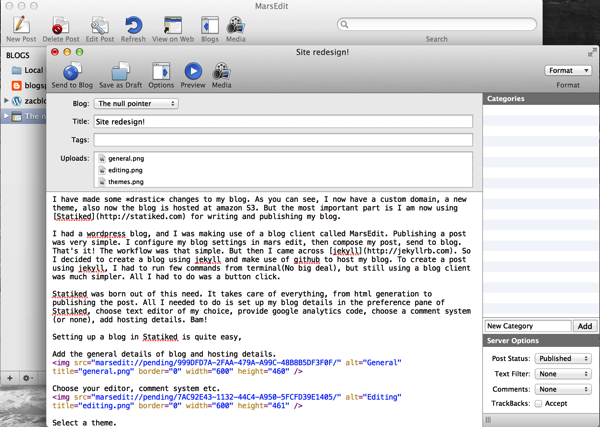
Now all I have to do is write a post, click publish from Statiked. Actually, Statiked also provides a metaweblog api endpoint. The default port is 6766, well I can change it in Statiked preference panel if I want to. So guess what? I am back to MarsEdit.

Now I’m all set to write a post. Next time when I want to write one,
- Launch Marsedit
- Write post
- Launch statiked
- Send to blog
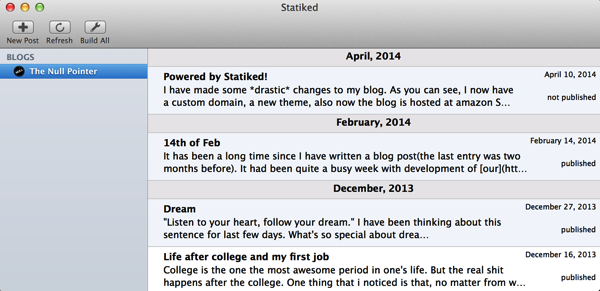
Here is the Statiked UI.
And yeah, on clicking the send to blog button, the post will be uploaded to my S3 bucket (Statiked should be running for this to happen!)
What if i want to switch from S3 to some other hosting, say github? Simple. Change the hosting settings from preference pane in Statiked and do a build all. Done! How about that? :)
What if I want my existing theme? Customising theme is also simple. This site is using a customised theme.
Download Statiked. Let us know your review, help us improve our product.
Cheers!!